Consistency training
No perfect days. Just consistent ones.
Back to workout

Exercise Instructions

Barbell Back Squat

Exercise guide — Setup / Technique / Tips / Mistakes

Why this one is in the program

The squat is the biggest leg builder there is, and nothing has replaced it.

One movement loads your quads, your glutes and your hamstrings at the same time, with a bar you can keep adding weight to for years. Your legs are the largest muscles in your body — train them properly and everything else follows, including how the rest of you looks.

And your core works the whole time. Holding a heavy bar on your back while you stand up out of a deep position trains your abs and lower back harder than most exercises built for them.

But this is a heavy bar on your spine. Everything below exists so you get the legs without the injury. Read the setup carefully — on this lift, a bad setup is not just a worse exercise, it's a dangerous one.

Setup

  • Set the bar in the rack at upper-chest height — not shoulder height, not higher.
  • Set the safety bars just below the depth you'll squat to. Always.
  • Step under the bar and rest it across your upper back, on the muscle — never on your neck.
  • Grip the bar firmly, hands just outside your shoulders, elbows pointing down.
  • Pull your shoulder blades together to make a shelf for the bar.
  • Stand up to unrack it, then take two steps back. No more.
  • Feet about shoulder-width apart, toes turned out slightly (about 15–30 degrees).
  • Take a big breath into your stomach and brace hard.

Why the setup does the work here

The bar goes on muscle, not bone. Squeeze your shoulder blades together and you build a shelf of muscle across your upper back. The bar sits there. If it's resting on your neck or the bony part of your spine, move it down.

Safety bars are not optional. Set them just below your lowest point. If a rep fails, you simply sit down and the bar lands on the pins instead of on you. This is the single most important thing in this whole guide.

Two steps back, not five. Every step you take with a loaded bar costs energy and adds risk. Unrack, two steps, set your feet, go.

Feet shoulder-width with toes slightly out is what lets your hips open so you can get deep with a flat back. Feet too narrow and your hips jam up before you reach depth.

Technique

  • Take a big breath into your stomach and tighten everything.
  • Push your hips back and bend your knees at the same time — sit down, not just back.
  • Let your knees travel forward over your toes. That's normal and safe.
  • Keep your chest up and your back flat the whole way.
  • Lower under control, about 2–3 seconds.
  • Go down until your thighs are at least parallel to the floor — hip crease level with the knee.
  • Drive back up through your mid-foot and heels, hips and chest rising together.
  • Stand tall at the top and breathe. Then reset and go again.

Why technique decides everything here

Your back stays flat from start to finish. Chest up, stomach braced. If your lower back rounds at the bottom, stop the rep there — that's your real depth for now, and it'll improve as your hips and ankles loosen up.

Depth matters more than weight. A half squat with 150 kg builds less than a full squat with 100. Thighs to parallel or just below is where your quads and glutes actually get trained. Anything shallower is mostly just loading your spine.

Hips and chest rise together. The classic failure is the hips shooting up first while the chest stays down — suddenly the bar is way out in front and your lower back is taking everything. Think "chest up as I drive."

Knees track over your toes. Don't let them cave inward. If they collapse in as you stand up, the weight is too heavy.

Common Mistakes

  • No safety bars set in the rack.
  • Resting the bar on the neck instead of the upper back.
  • Rounding the lower back at the bottom.
  • Not going deep enough — stopping well above parallel.
  • Hips shooting up first while the chest drops forward.
  • Knees caving inward on the way up.
  • Rising onto the toes with the heels coming off the floor.
  • Bouncing out of the bottom.
  • Taking too many steps back out of the rack.

Where people lose results

No safety bars. The one that actually hurts people. A failed squat with no pins means you're stuck under a loaded bar. Fix: set them every single time, just below your bottom position — even on your warm-up sets.

Rounding the lower back. Happens when the weight is too heavy or when you force depth your hips can't reach yet. Fix: lighten the bar, and stop at the depth where your back is still flat.

Half reps. The most common way people waste squats. It feels productive because the number is big, but the range is where the muscle is. Fix: thighs to parallel, or just below.

Hips rising first. Turns a squat into a bent-over good morning with a bar on your back. Fix: chest up, drive hips and shoulders at the same speed. If it keeps happening, the weight is too heavy.

Knees caving in. A sign your glutes are being overpowered. Fix: push your knees out in line with your toes as you stand.

Heels lifting off the floor. Usually tight ankles. Fix: keep your weight on your mid-foot, widen your stance slightly, and consider flat-soled shoes or a small heel wedge.

Too heavy, or too light. Too heavy and all of the above show up at once. Too light and nothing grows.

The honest test: flat back, thighs to parallel, 2–3 seconds down, heels planted, no knee cave. If you can't do that for your full rep range, that's not your weight.

Stay in the 5–12 rep range. And remember the rule for heavy barbell lifts: this one never goes to failure. Stop 1–2 reps short on every working set. The last ugly rep is where squats hurt people, and it isn't worth it.
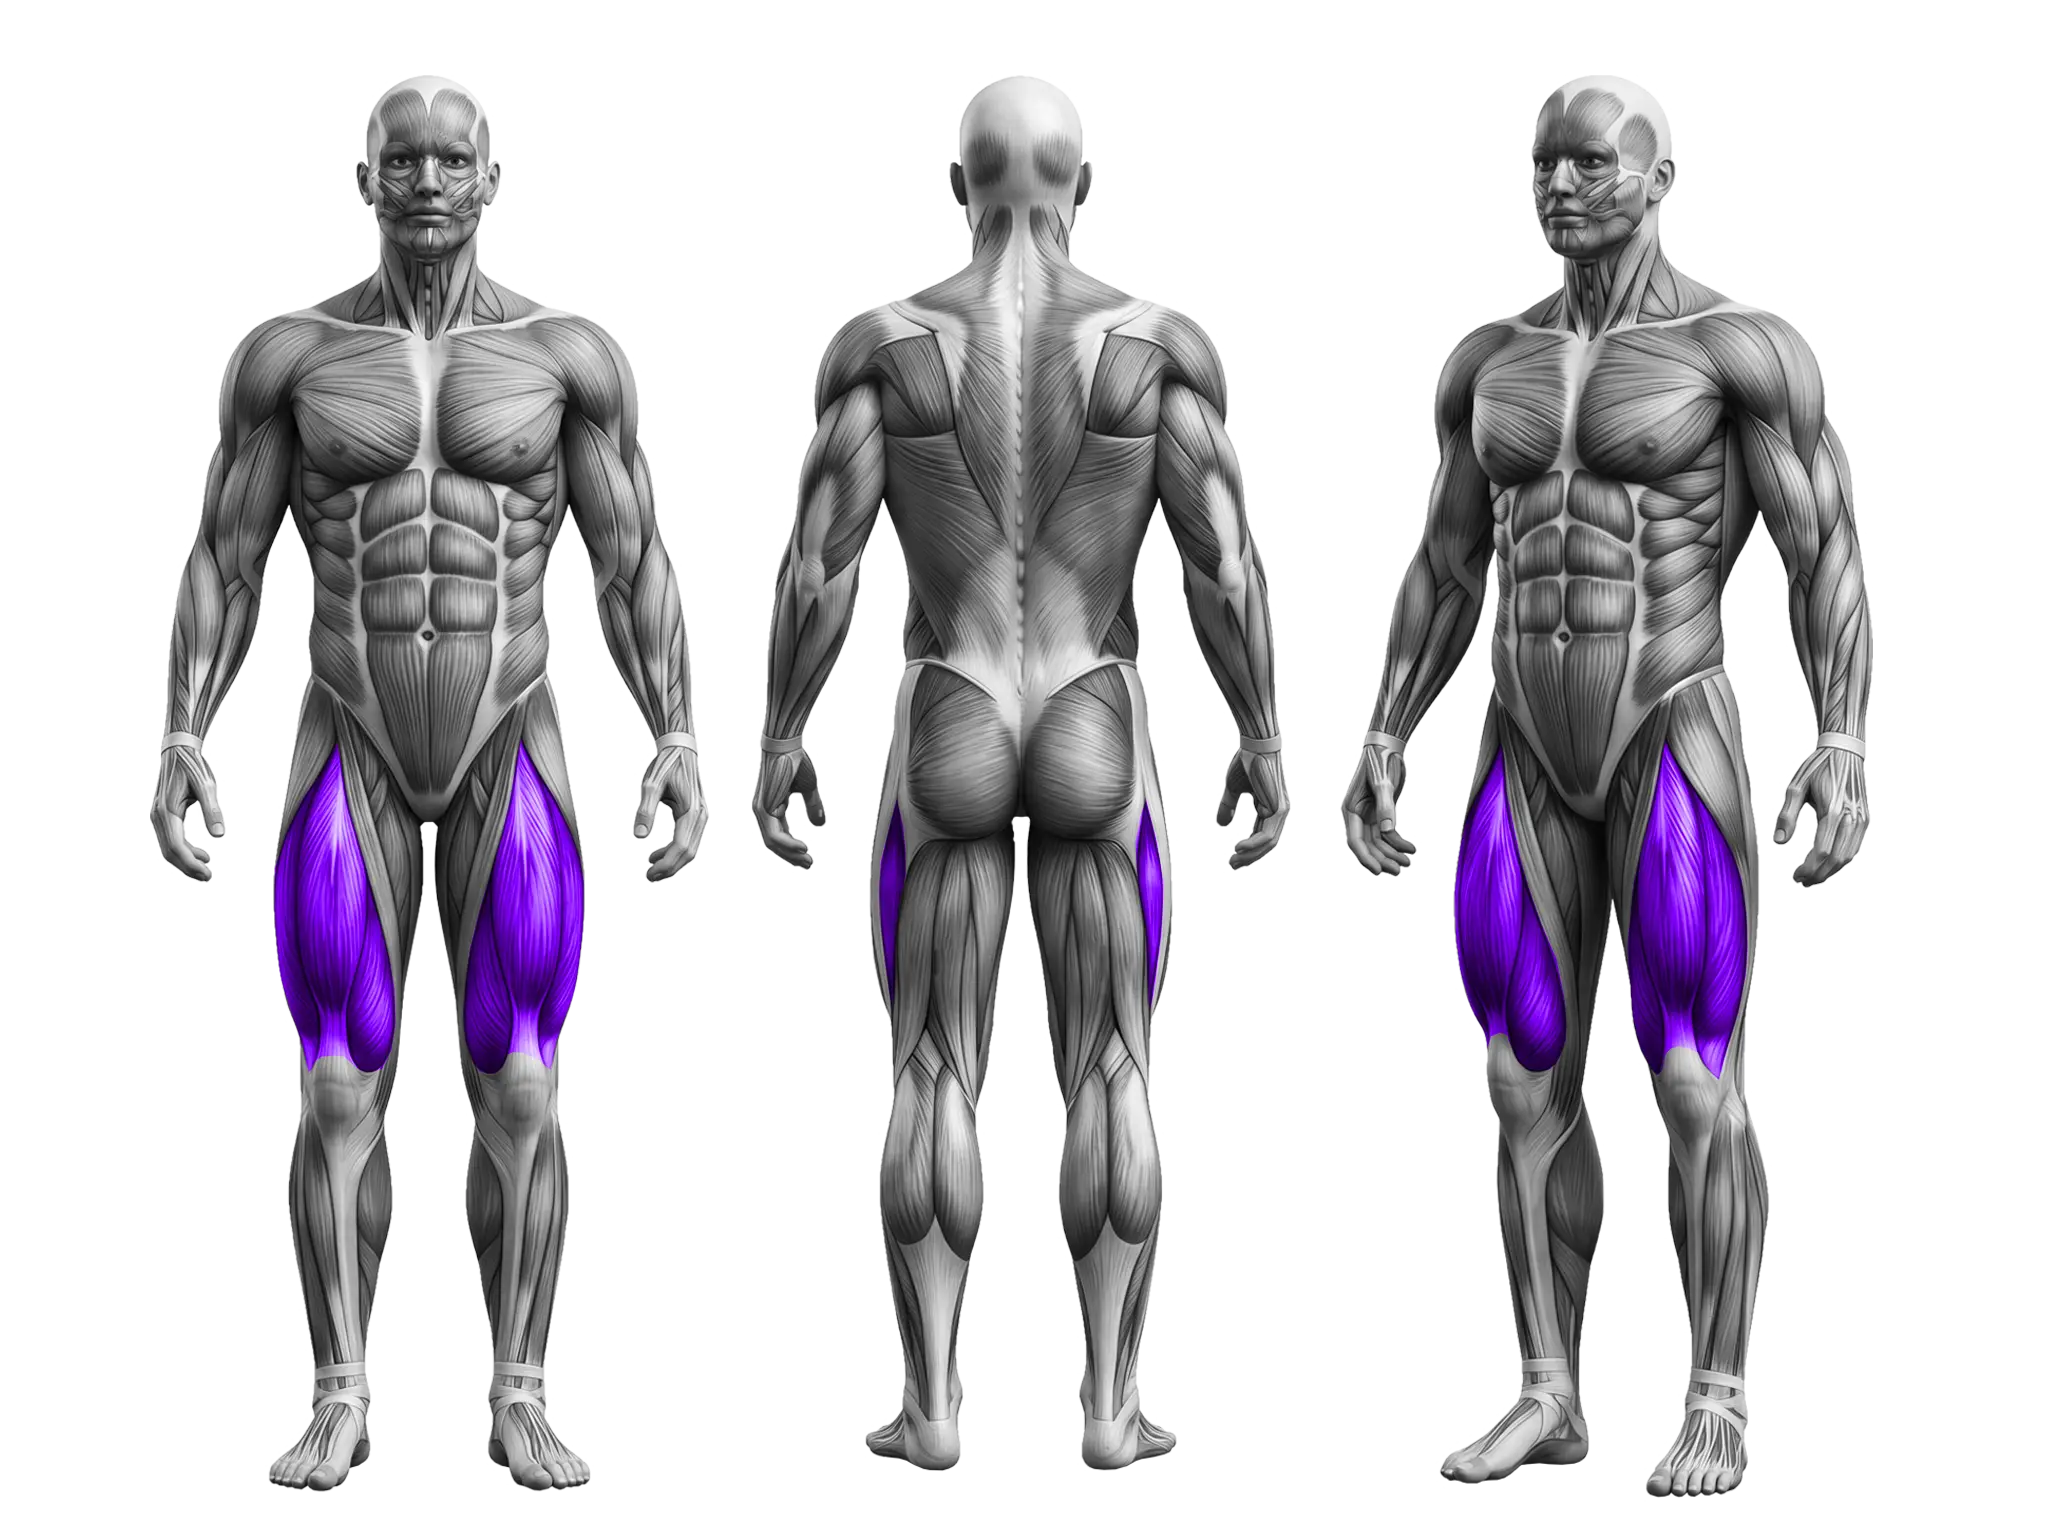
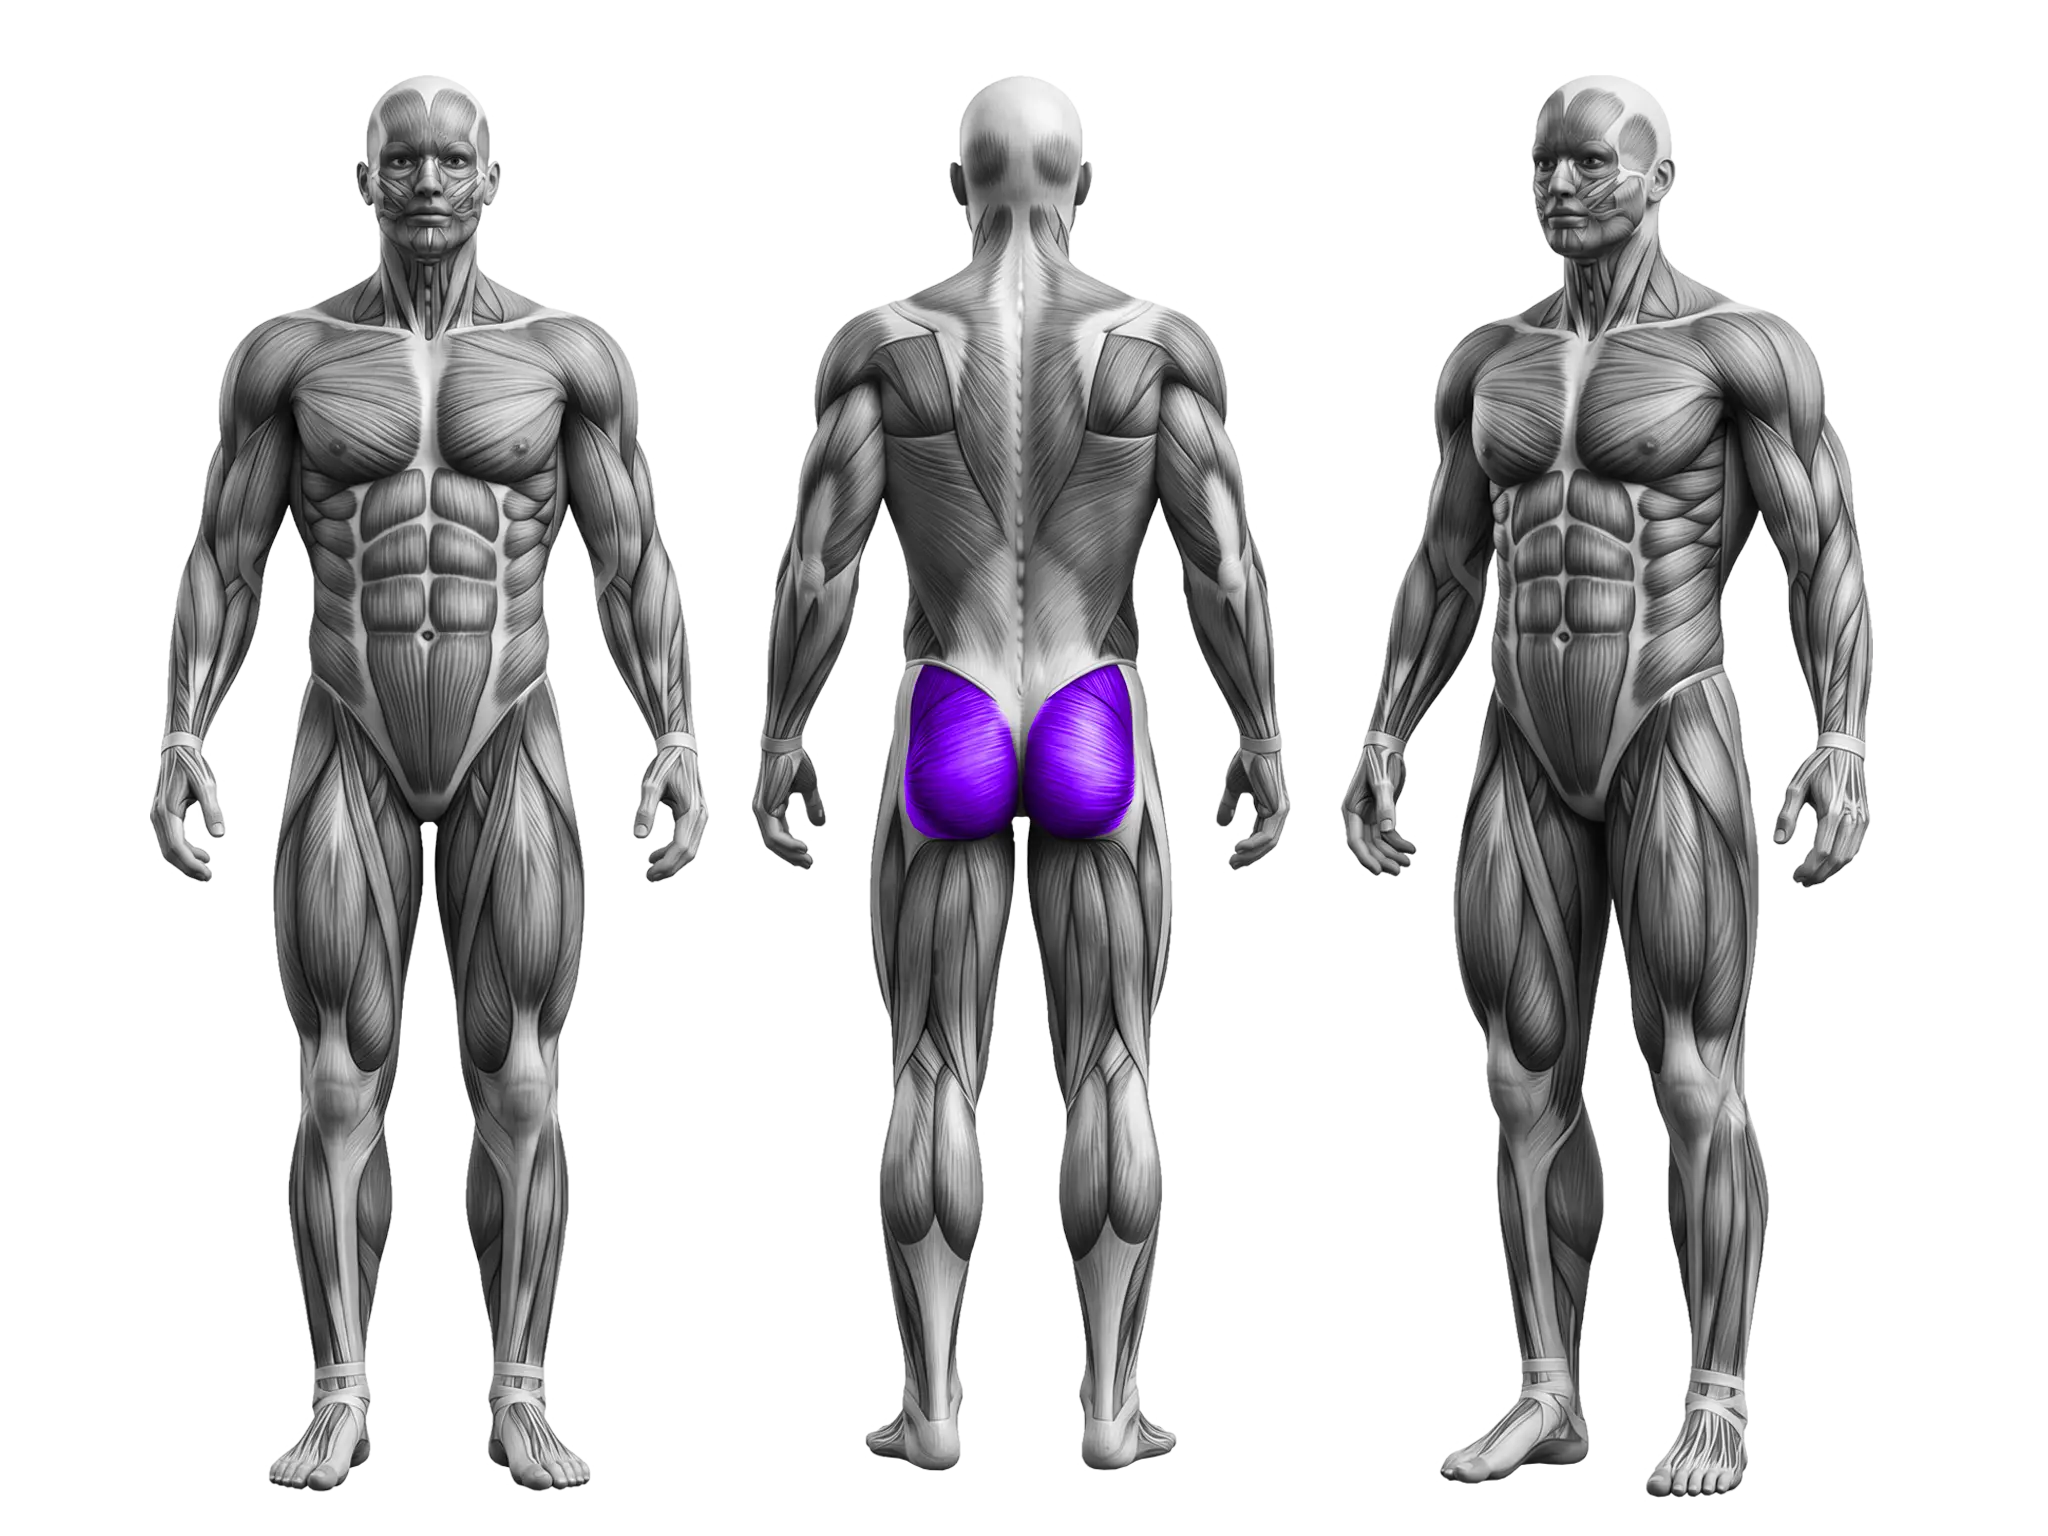
Target Muscles
Quadriceps
Primary
Gluteus Maximus
Assisting
Hamstrings, Adductors, Spinal Erectors & Core
Assisting
Recommended Equipment

Squat Rack (with safety bars) and a Barbell
A power rack or squat stand with adjustable hooks and — critically — adjustable safety bars.

Set the bar hooks at upper-chest height, so you lift the bar off with a short stand-up rather than a tiptoe reach. Set the safety bars just below your bottom position, so that if a rep fails you can simply sit down and let the bar land on the pins. Do this on every set, including warm-ups. This is the one piece of setup that turns a risky lift into a safe one.

The bar itself is a standard Olympic barbell, 20 kg on its own. If that's already too much, start with a lighter bar or learn the movement with a goblet squat first — the bar is not the exercise, the depth and the flat back are.

Rest the bar across your upper back muscles, never on your neck, with your shoulder blades squeezed together to make a shelf for it.

Exercise Instructions

Barbell Back Squat

Exercise guide — Setup / Technique / Tips / Mistakes

Why this one is in the program

The squat is the biggest leg builder there is, and nothing has replaced it.

One movement loads your quads, your glutes and your hamstrings at the same time, with a bar you can keep adding weight to for years. Your legs are the largest muscles in your body — train them properly and everything else follows, including how the rest of you looks.

And your core works the whole time. Holding a heavy bar on your back while you stand up out of a deep position trains your abs and lower back harder than most exercises built for them.

But this is a heavy bar on your spine. Everything below exists so you get the legs without the injury. Read the setup carefully — on this lift, a bad setup is not just a worse exercise, it's a dangerous one.

Setup

  • Set the bar in the rack at upper-chest height — not shoulder height, not higher.
  • Set the safety bars just below the depth you'll squat to. Always.
  • Step under the bar and rest it across your upper back, on the muscle — never on your neck.
  • Grip the bar firmly, hands just outside your shoulders, elbows pointing down.
  • Pull your shoulder blades together to make a shelf for the bar.
  • Stand up to unrack it, then take two steps back. No more.
  • Feet about shoulder-width apart, toes turned out slightly (about 15–30 degrees).
  • Take a big breath into your stomach and brace hard.

Why the setup does the work here

The bar goes on muscle, not bone. Squeeze your shoulder blades together and you build a shelf of muscle across your upper back. The bar sits there. If it's resting on your neck or the bony part of your spine, move it down.

Safety bars are not optional. Set them just below your lowest point. If a rep fails, you simply sit down and the bar lands on the pins instead of on you. This is the single most important thing in this whole guide.

Two steps back, not five. Every step you take with a loaded bar costs energy and adds risk. Unrack, two steps, set your feet, go.

Feet shoulder-width with toes slightly out is what lets your hips open so you can get deep with a flat back. Feet too narrow and your hips jam up before you reach depth.

Technique

  • Take a big breath into your stomach and tighten everything.
  • Push your hips back and bend your knees at the same time — sit down, not just back.
  • Let your knees travel forward over your toes. That's normal and safe.
  • Keep your chest up and your back flat the whole way.
  • Lower under control, about 2–3 seconds.
  • Go down until your thighs are at least parallel to the floor — hip crease level with the knee.
  • Drive back up through your mid-foot and heels, hips and chest rising together.
  • Stand tall at the top and breathe. Then reset and go again.

Why technique decides everything here

Your back stays flat from start to finish. Chest up, stomach braced. If your lower back rounds at the bottom, stop the rep there — that's your real depth for now, and it'll improve as your hips and ankles loosen up.

Depth matters more than weight. A half squat with 150 kg builds less than a full squat with 100. Thighs to parallel or just below is where your quads and glutes actually get trained. Anything shallower is mostly just loading your spine.

Hips and chest rise together. The classic failure is the hips shooting up first while the chest stays down — suddenly the bar is way out in front and your lower back is taking everything. Think "chest up as I drive."

Knees track over your toes. Don't let them cave inward. If they collapse in as you stand up, the weight is too heavy.

Common Mistakes

  • No safety bars set in the rack.
  • Resting the bar on the neck instead of the upper back.
  • Rounding the lower back at the bottom.
  • Not going deep enough — stopping well above parallel.
  • Hips shooting up first while the chest drops forward.
  • Knees caving inward on the way up.
  • Rising onto the toes with the heels coming off the floor.
  • Bouncing out of the bottom.
  • Taking too many steps back out of the rack.

Where people lose results

No safety bars. The one that actually hurts people. A failed squat with no pins means you're stuck under a loaded bar. Fix: set them every single time, just below your bottom position — even on your warm-up sets.

Rounding the lower back. Happens when the weight is too heavy or when you force depth your hips can't reach yet. Fix: lighten the bar, and stop at the depth where your back is still flat.

Half reps. The most common way people waste squats. It feels productive because the number is big, but the range is where the muscle is. Fix: thighs to parallel, or just below.

Hips rising first. Turns a squat into a bent-over good morning with a bar on your back. Fix: chest up, drive hips and shoulders at the same speed. If it keeps happening, the weight is too heavy.

Knees caving in. A sign your glutes are being overpowered. Fix: push your knees out in line with your toes as you stand.

Heels lifting off the floor. Usually tight ankles. Fix: keep your weight on your mid-foot, widen your stance slightly, and consider flat-soled shoes or a small heel wedge.

Too heavy, or too light. Too heavy and all of the above show up at once. Too light and nothing grows.

The honest test: flat back, thighs to parallel, 2–3 seconds down, heels planted, no knee cave. If you can't do that for your full rep range, that's not your weight.

Stay in the 5–12 rep range. And remember the rule for heavy barbell lifts: this one never goes to failure. Stop 1–2 reps short on every working set. The last ugly rep is where squats hurt people, and it isn't worth it.
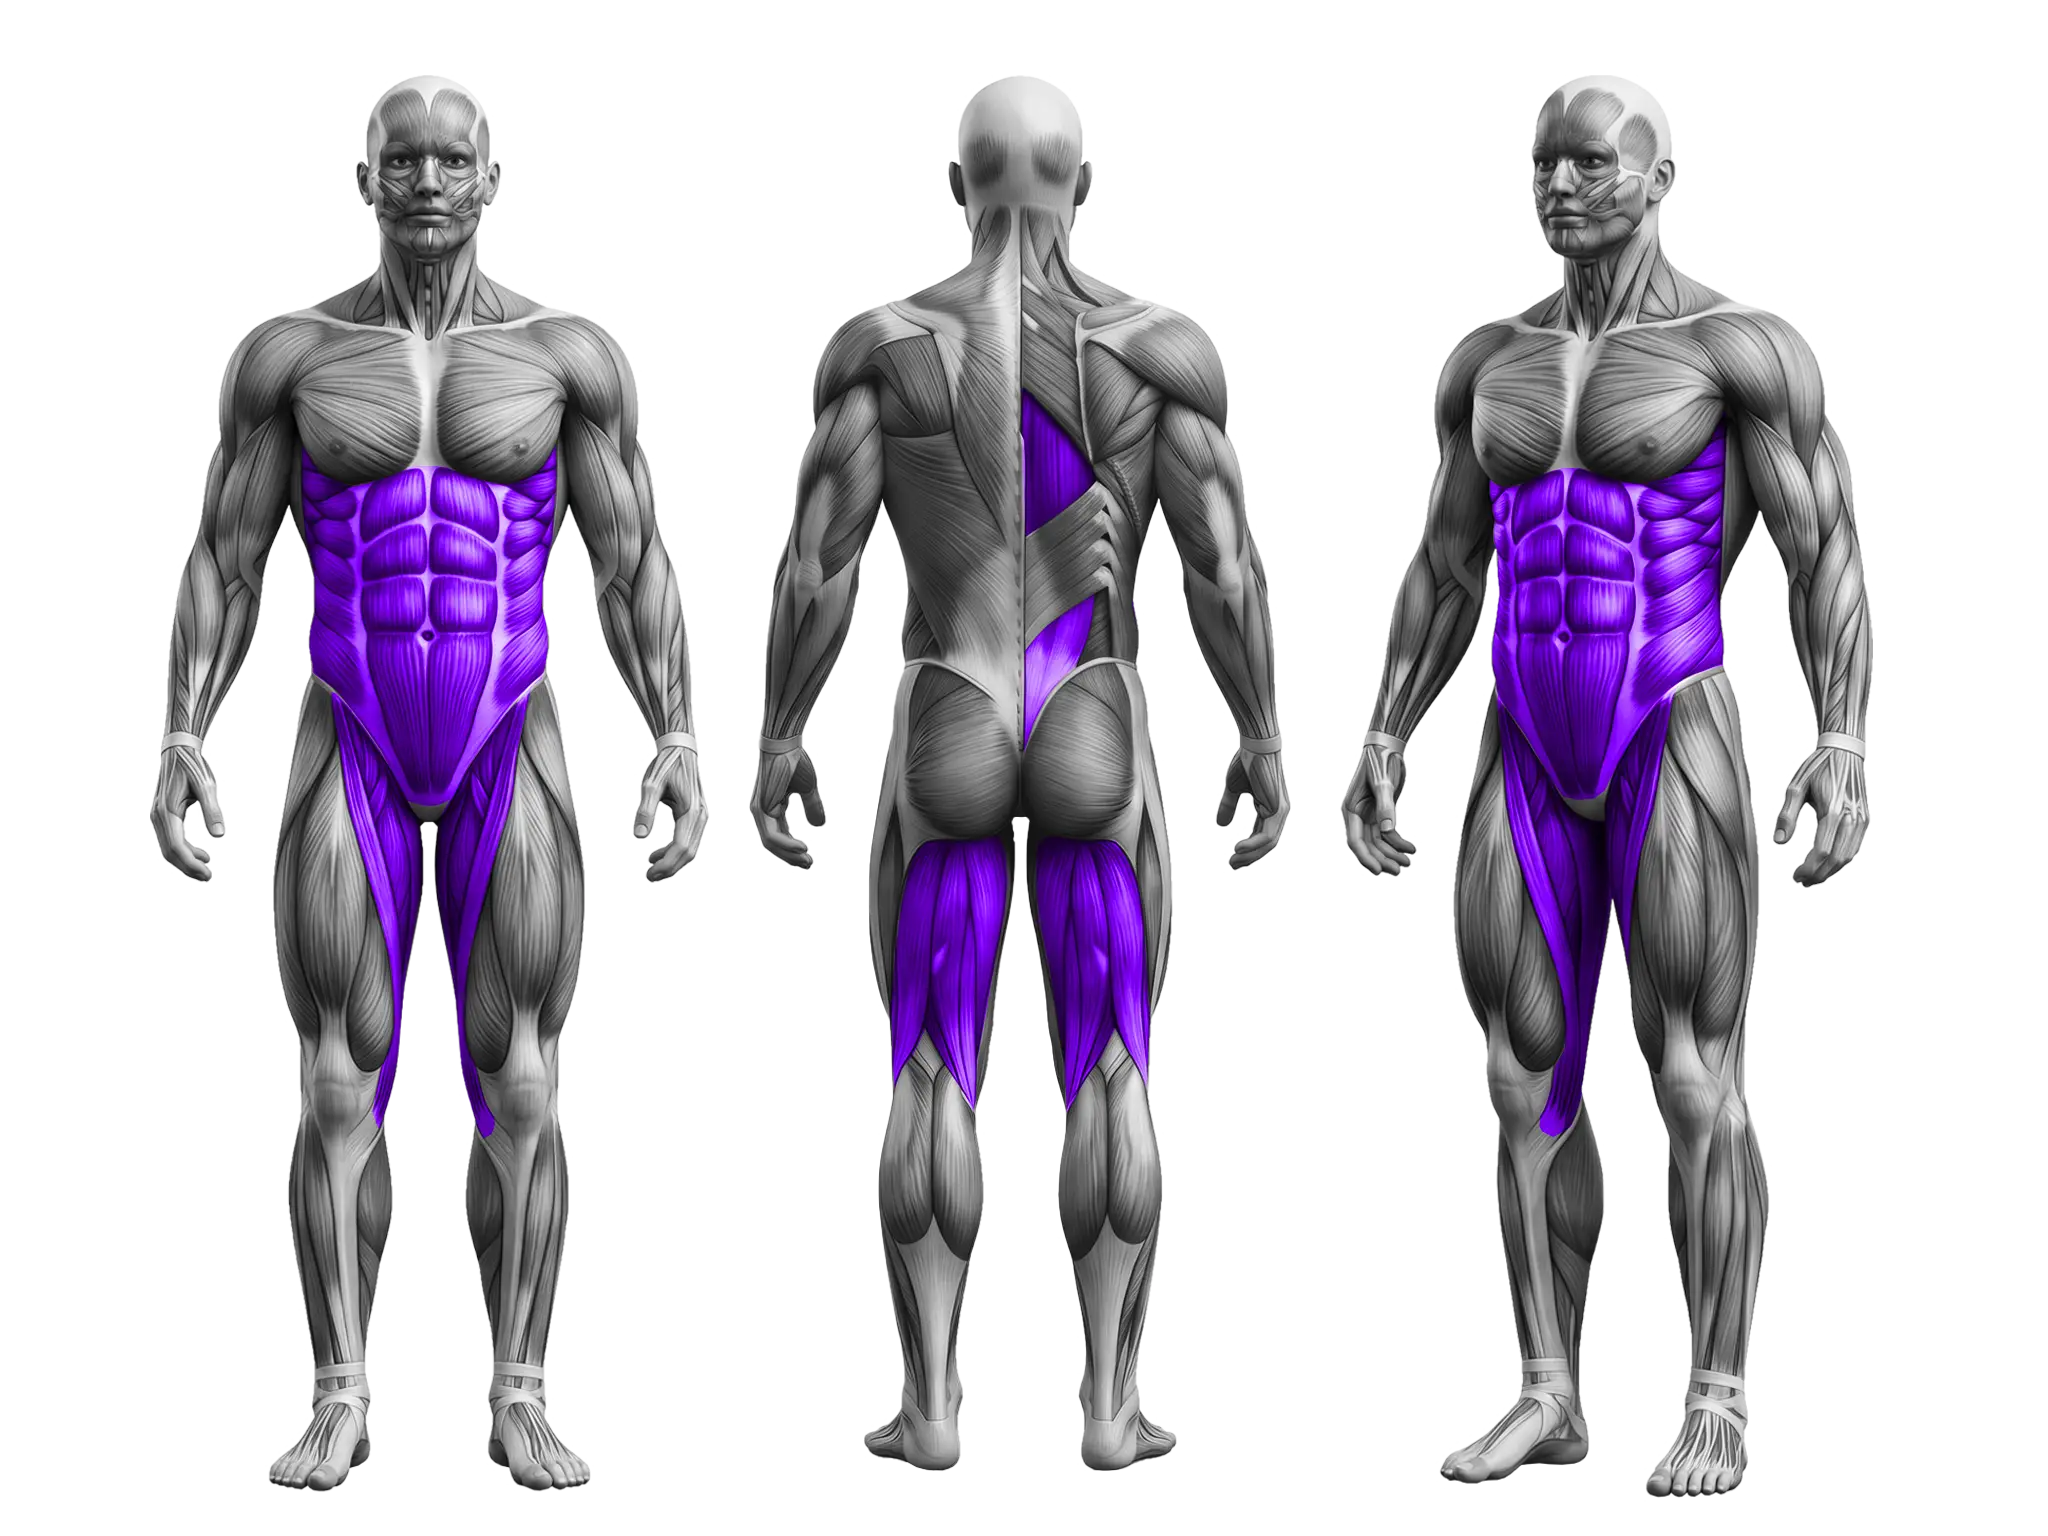
Target Muscles
Quadriceps
Primary
Gluteus Maximus
Assisting
Hamstrings, Adductors, Spinal Erectors & Core
Assisting
Recommended Equipment

Squat Rack (with safety bars) and a Barbell
A power rack or squat stand with adjustable hooks and — critically — adjustable safety bars.

Set the bar hooks at upper-chest height, so you lift the bar off with a short stand-up rather than a tiptoe reach. Set the safety bars just below your bottom position, so that if a rep fails you can simply sit down and let the bar land on the pins. Do this on every set, including warm-ups. This is the one piece of setup that turns a risky lift into a safe one.

The bar itself is a standard Olympic barbell, 20 kg on its own. If that's already too much, start with a lighter bar or learn the movement with a goblet squat first — the bar is not the exercise, the depth and the flat back are.

Rest the bar across your upper back muscles, never on your neck, with your shoulder blades squeezed together to make a shelf for it.

Gym Alternative
Smith Machine Squat

The bar runs on a fixed track with safety hooks you can rotate into at any point, so you don't have to balance it and you can push harder on your own. You lose some of the core and stabiliser work, but you gain safety and the ability to train hard without a spotter. Best swap if you train alone or you're still learning the movement.

Additional gym alternatives, best to worst:

Additional gym alternatives:

  1. Hack Squat Machine — your back is supported, very quad-focused, easy to push near failure
  2. Leg Press — no load on the spine at all; the best option if your lower back is beat up
  3. Goblet Squat — one dumbbell held at your chest; the best way to learn squat depth and position
Home Alternative
Dumbbell Squat

A dumbbell in each hand hanging at your sides, or one heavy dumbbell held against your chest (a goblet squat). Feet shoulder-width, toes slightly out, sit down to parallel with a flat back, drive back up.

Holding the weight at your chest actually makes it easier to stay upright and reach good depth than a barbell does, so this is a genuinely good option — not a compromise. The only limit is how heavy your dumbbells go.

Additional home alternatives:

Additional home alternatives:

  1. Backpack Squat — a loaded backpack worn on your back or held at your chest
  2. Bulgarian Split Squat — one leg at a time with your back foot on a chair; brutal with very little weight
  3. Bodyweight Squat (slow tempo, 2-second pause at the bottom) — no weight needed; slow it right down and it still works